如何使用PS合成制作超酷的科幻能量场景?(2)
18、之后的“inner light 3”也一样,ctrl+T,旋转90°。图层混合模式:滤色。添加蒙版,擦拭中间的部分。
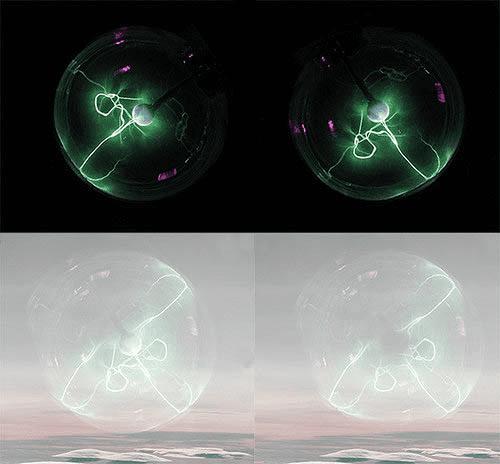
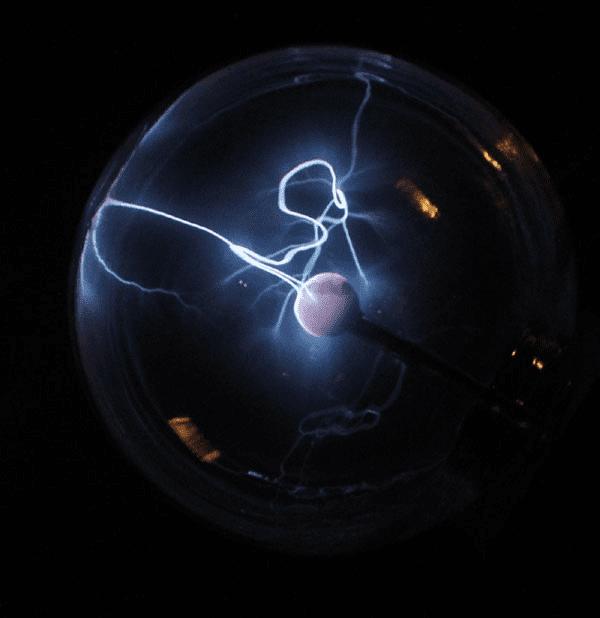
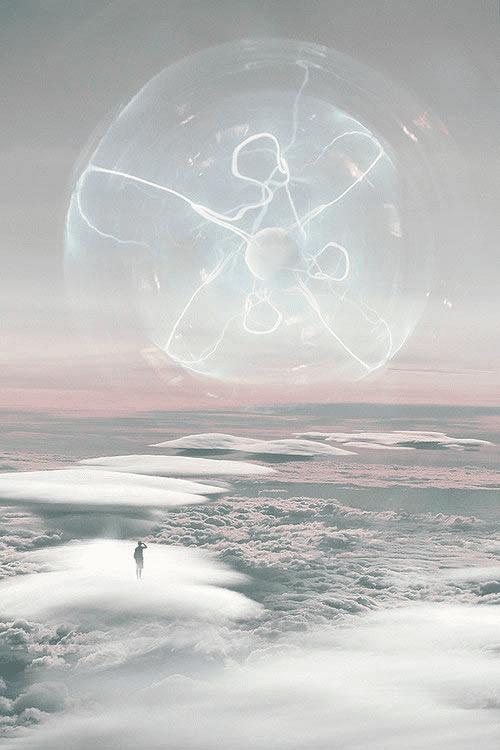
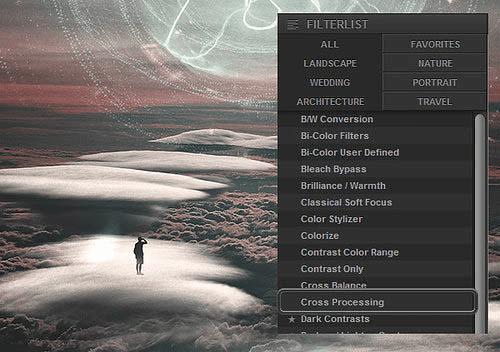
19、拖进“portal”素材 ,放置在最顶层,并命名为 “PORTAL”。图层混合模式:滤色。这个球状物在中间有点亮,减少一些亮度,添加蒙版,软笔刷,用之前的步骤的设置,进行擦拭。效果如图所示。
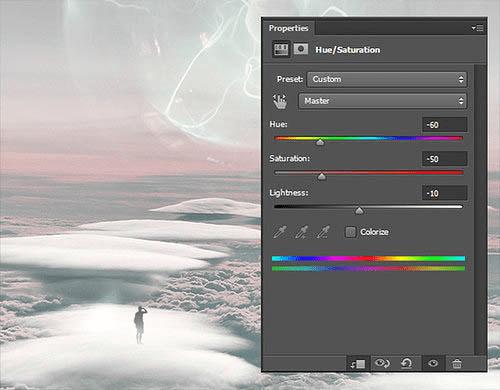
20、添加色相/饱和度,设置为剪切蒙版,色相 :-60 饱和度:-50,亮度:-10。
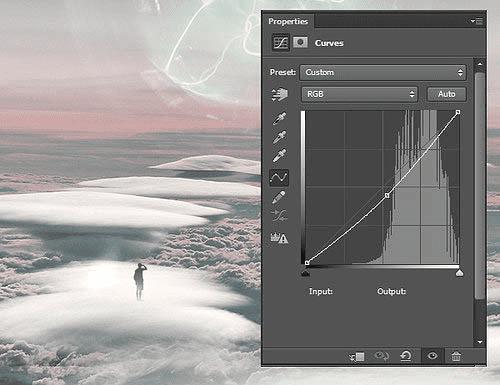
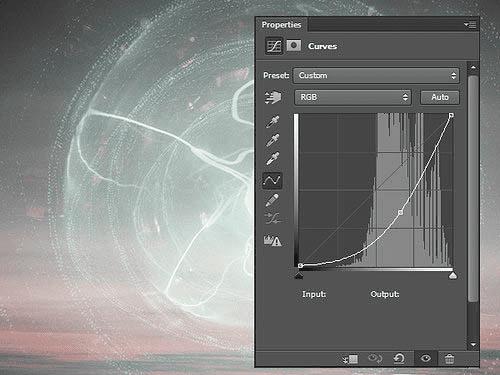
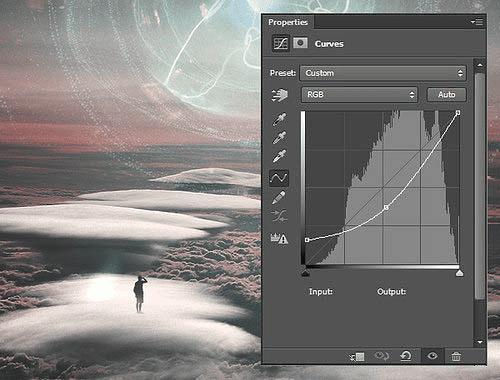
21、这一步你讲使你的图片轻微的变暗。“曲线”,设置 如图所示。
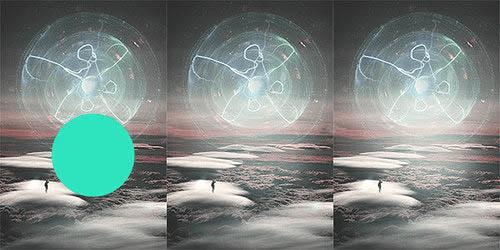
22、拖进 “details”素材,放置在最顶层,命名为“DETAILS” ,然后复制一层 ,命名为“DETAILS 2”,先隐藏它。 给“DETAILS”添加蒙版,然后改变图层混合模式“滤色”,透明度:40%,用软笔刷 (黑),在如图所示的青色区域上擦拭。
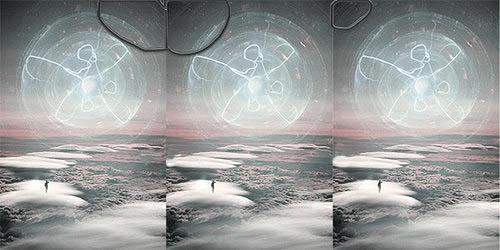
23、显示“DETAILS 2”,Ctrl+T,旋转90°,改变混合模式“滤色”,透明度:40%,添加图层蒙版,在如图所示的青色区域上擦拭。
24、这步增加一个暗角效果,新建“曲线”,设置如图所示。
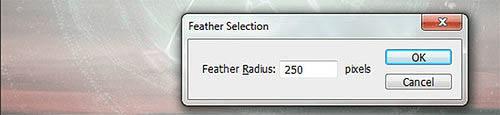
25、你只是想让边角变暗,为了达到该效果,新建 图层,椭圆选框工具(M),并在图像的中心创建一个椭圆。选择>修改>羽化:25px,反眩之后 “油漆桶”工具,黑色,填充图层。
26、在“DETAILS”上新建图层,命名为“MIST”,软笔刷(黑色),并设置其不透明度为 20%。选择一个非常明亮的蓝色。在图层的中间画一个圆,然后设置“滤色 ”,效果如下图所示。
27、为了让照片看上去更平衡,你需要在光圈上加细节。拖动details.jpg到你的照片处理,并复制两次 ,所以现在你有三个图层。 将它们命名为亮部细节1,2和3。改变自己的混合模式为:滤色,并与图像的其余部分将它们混合。看看下面的图片看到在哪里放置这些层。
28、 新建 “曲线”。
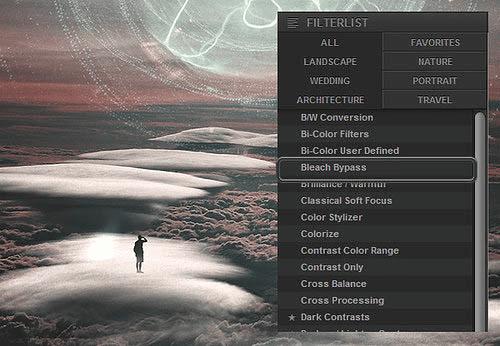
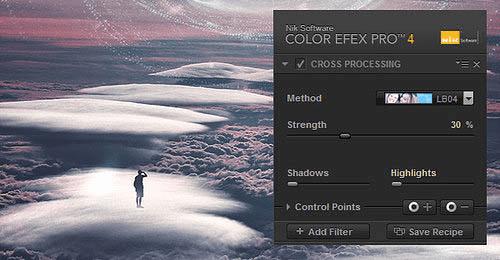
29、 对于这一步,你需要有一个Photoshop插件叫做Color Efex Pro的。这是一个付费插件,但提供了一个14天的试用期,所以你应该能够完成本教程不买它。下载地址:http://pan.baidu.com/s/1eQFHaD0 安装好后返回。用矩形选框工具,然后选中所有的图。编辑>复制合并,编辑>粘贴。在顶层新建图层,并命名为“COLORS”。滤镜>调色滤镜>Color Efex Pro,在左边的菜单,选择“Bleach Bypass”设置如下,然后确定。

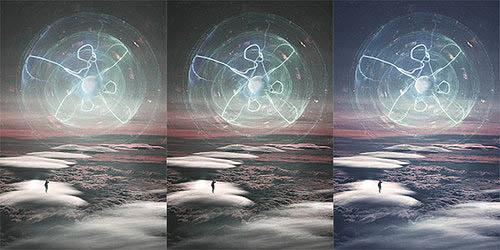
30、再选“Cross Processing”正片负冲,然后设置如下,确定。
31、在最上层新建“色相/饱和度”,饱和度-20。

32、拖入“texture”素材,放置在最上层。命名为“TEXTURE”。图层混合模式:柔光,透明度20%。 为了给照片增加点暗角效果,新建图层,命名为“DARKENING”,图层混合模式:柔光。选择软笔刷(黑),透明度10%,然后如下图的青色区域里画。


33、现在是最后一步,增加镜头光晕,给整个图添加更好的光效。在最上层新建,然后填充黑色。滤镜>渲染>镜头光晕,选择105mm,中心,然后设置如下。图层混合模式:滤镜。透明度75%。
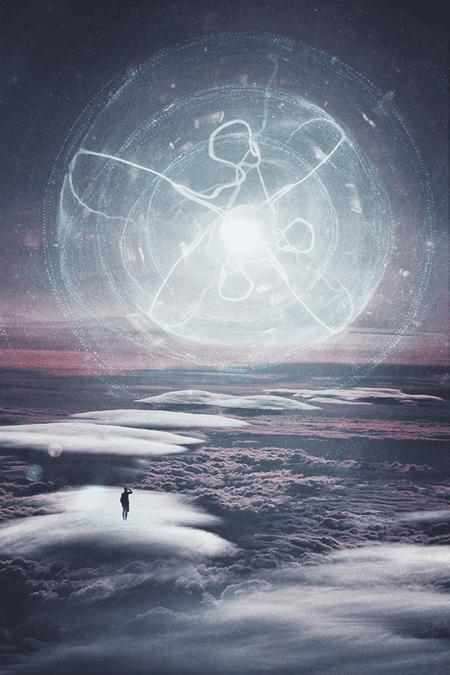
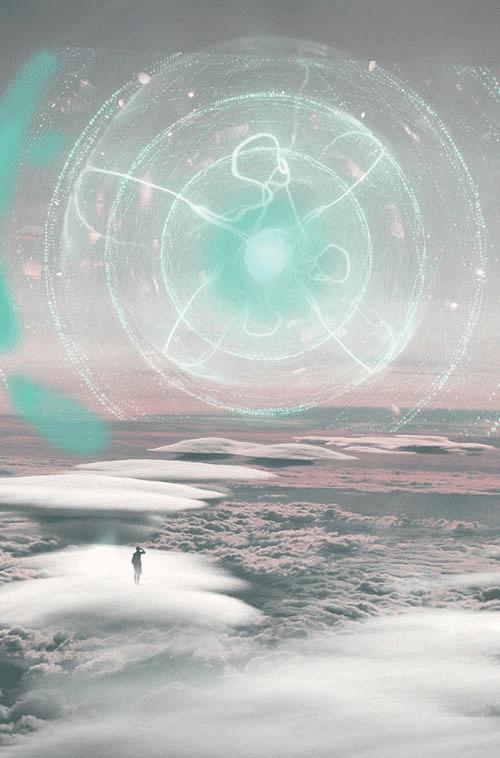
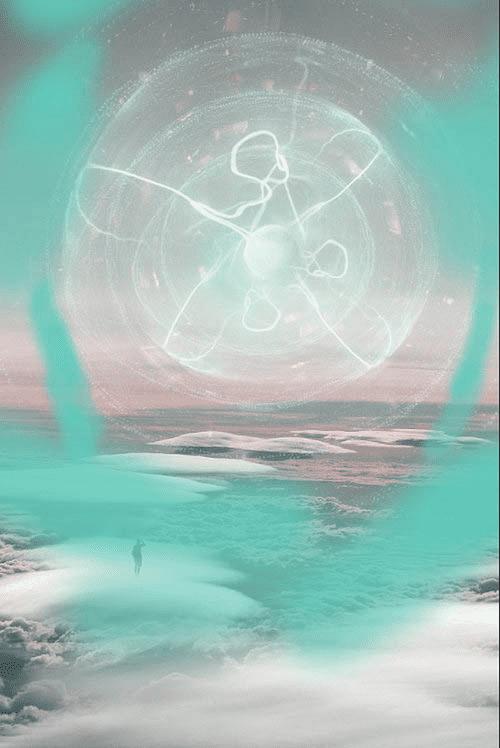
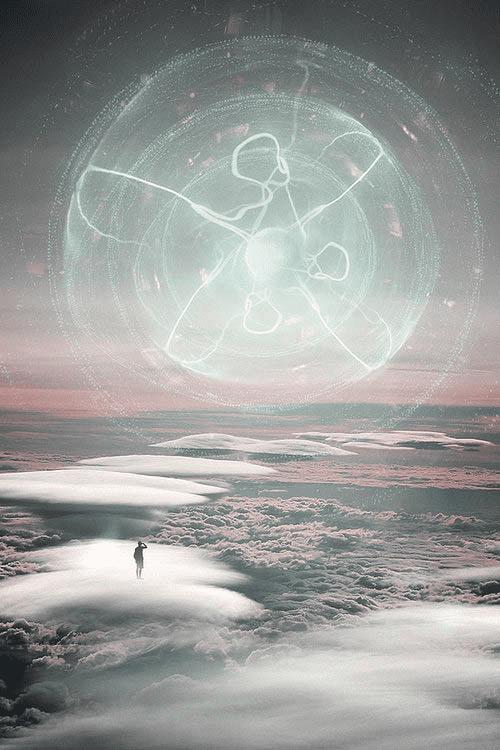
最终效果: